STM32开发环境配置 Update 2021
1.前言
笔者其实写过一个关于STM32配置的教程,然而,CLion上的部分Plugin已经停止支持,这意味这新版本的CLion将无法继续用于STM32开发(目前失效的Plugin有:OpenOCD, CubeMX)。于是,寻找一种新的优雅地开发STM32方式的任务便被提上了日程。加之笔者 很久之前就配好了,但是鸽了 最近发现实际上还有另外两种方式可以在CubeIDE等基于Eclipse的IDE上实现自动补全,由于其中一种尚未完全可用,这里先按下不表,暂且介绍一种简单但是并不算太好用的方案
2.改造CubeIDE
1.安装CubeIDE
略
2.魔改CubeIDE实现自动补全
- 需要的插件(工具):
- CDT插件 (用于提供自动补全)
- Eclpise Plug-in Development Environment (用于魔改CDT)
-
插件安装
-
CDT安装:
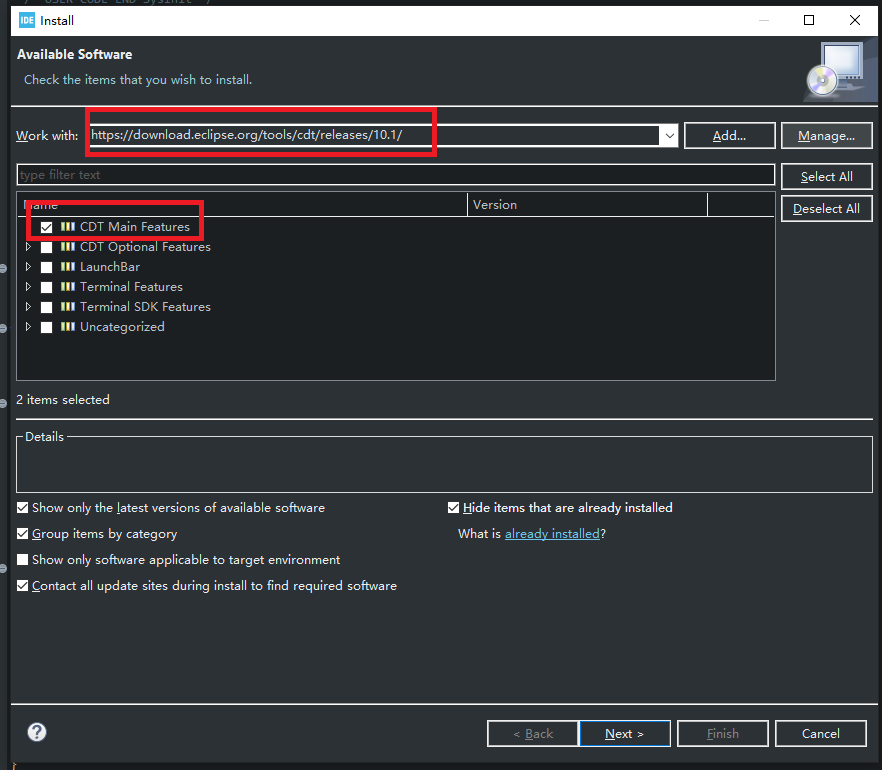
首先添加软件源
打开Help->Install New Software
然后在下方的编辑框内输入软件源地址
https://download.eclipse.org/tools/cdt/releases/10.1/
并勾选CDT Main Features,完成后大概是这样

然后就是安装东西的基本操作了(应该不会有玩技术的不会=.=) -
Eclpise Plug-in Development Environment安装:
首先还是添加软件源,方法同上,源地址为:
https://download.eclipse.org/releases/photon/
需要添加的功能为:
General Purpose Tools->Eclipse Plug-in Develoment Environment -
开始魔改CDT
-
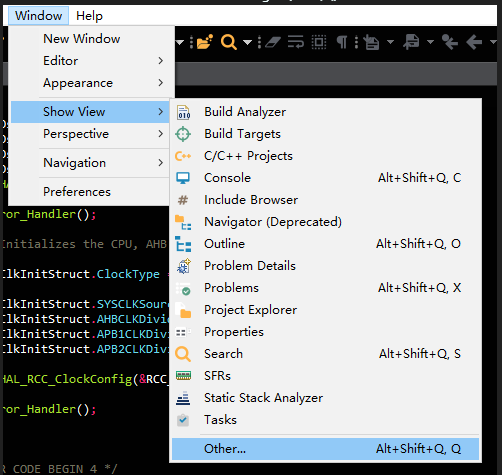
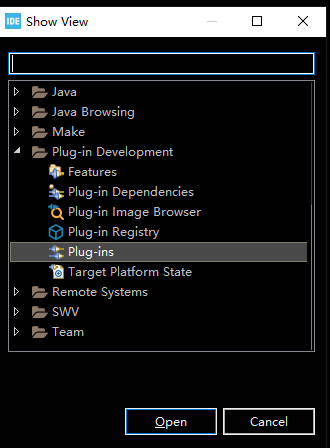
在Window->Show View->Other中找到Plugins(如下图)


-
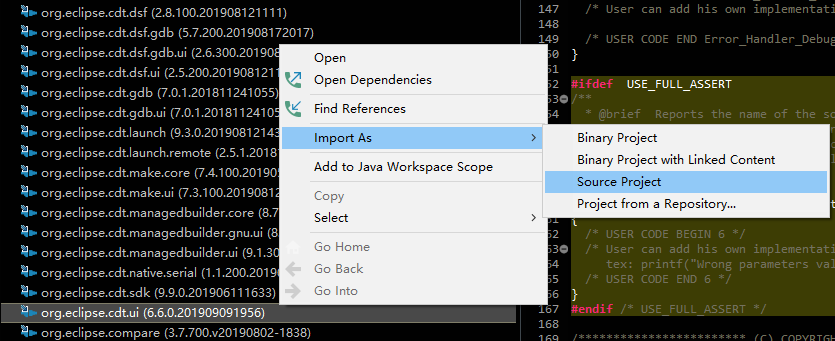
导入org.cdt.ui

-
打开工程并修改代码
找到org.eclipse.cdt.ui->src->org.ecliplse.cdt.internal.ui.text.contentassist->ContentAssitProcessor,将:public void setCompletionProposalAutoActivationCharacters(char[] activationSet) { fCompletionAutoActivationCharacters = activationSet; }替换为:
public void setCompletionProposalAutoActivationCharacters(char[] activationSet) {
    char [] Trigger = ".ABCDEFGHIJKLMNOPQRSTUVWXYZabcdefghijklmnopqrstuvwxyz".toCharArray();
    fCompletionAutoActivationCharacters = Trigger;
}
找到org.eclipse.cdt.ui->src->org.ecliplse.cdt.internal.ui.text.contentassist->CContentAssistProcessor,将:
protected boolean verifyAutoActivation(ITextViewer viewer, int offset) {
    IDocument doc = viewer.getDocument();
    if (doc == null) {
        return false;
    }
    if (offset <= 0) {
        return false;
    }
    try {
        char activationChar = doc.getChar(--offset);
        switch (activationChar) {
            case ':':
                return offset > 0 && doc.getChar(--offset) == ':';
            case '>':
                return offset > 0 && doc.getChar(--offset) == '-';
            case '.':
                // Avoid completion of float literals
                CHeuristicScanner scanner = new CHeuristicScanner(doc);
                int token = scanner.previousToken(--offset, Math.max(0, offset - 200));
                // The scanner reports numbers as identifiers
                if (token == Symbols.TokenIDENT&& !Character.isJavaIdentifierStart(doc.getChar(scanner.getPosition() + 1))) {
                    // Not a valid identifier
                    return false;
                }
                return true;
            }
        } catch (BadLocationException e) {
        }
    return false;
}
替换为:
protected boolean verifyAutoActivation(ITextViewer viewer, int offset) { IDocument doc = viewer.getDocument(); if (doc == null) { return false; } if (offset <= 0) { return false; } try { char activationChar = doc.getChar(--offset); switch (activationChar) { case ':': return offset > 0 && doc.getChar(--offset) == ':'; case '>': return offset > 0 && doc.getChar(--offset) == '-'; case '.': // Avoid completion of float literals CHeuristicScanner scanner = new CHeuristicScanner(doc); int token = scanner.previousToken(--offset, Math.max(0, offset - 200)); // The scanner reports numbers as identifiers if (token == Symbols.TokenIDENT&& !Character.isJavaIdentifierStart(doc.getChar(scanner.getPosition() + 1))) { // Not a valid identifier return false; } return true; default: return activationChar >= 97 && activationChar <= 122?true:activationChar >= 65 && activationChar <= 90; } } catch (BadLocationException e) { } return false; } -
重新编译JAR包
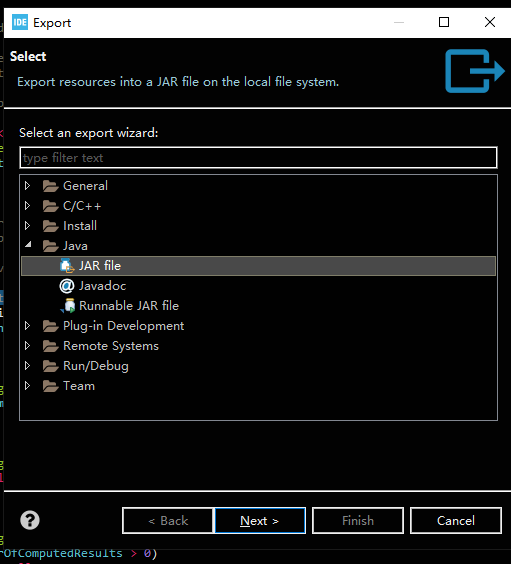
在工程上点击右键->Export,选择

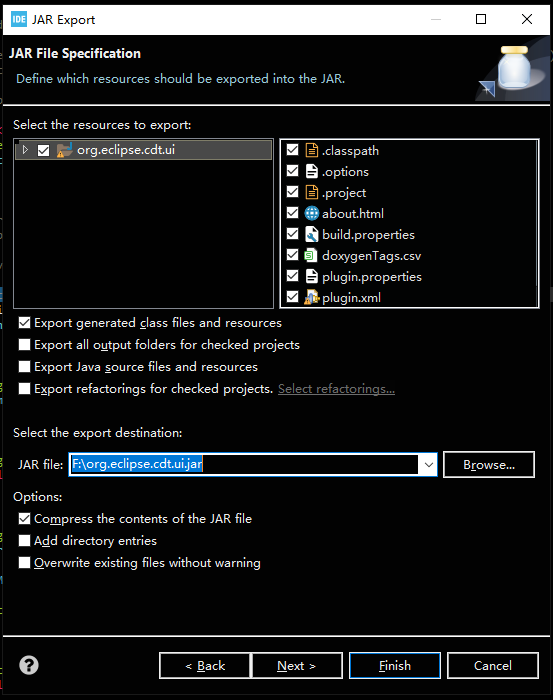
点击Next,然后选择一个能找到的路径,保存导出的JAR包

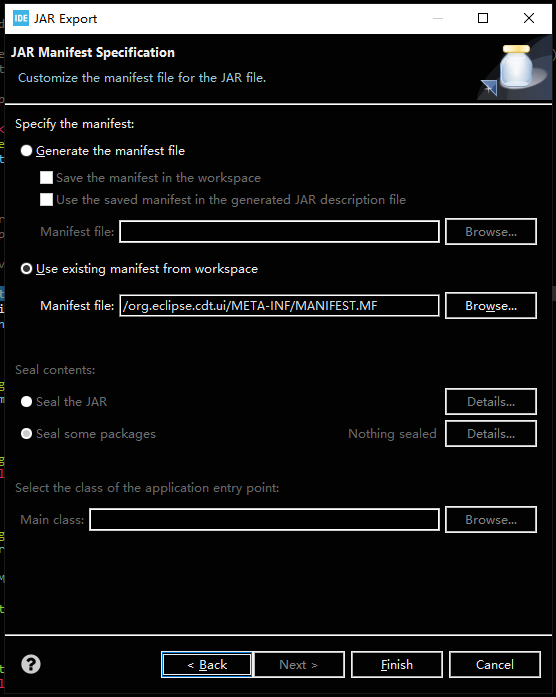
单击两次Next,使用现有的签名继续导出,如图

最后单击Finish完成导出
-
-
使用修改后的文件替换原有的文件
在 CubeIDE安装路径\plugins 中搜索 org.eclipse.cdt.ui(后面代表版本号的数字可能有差异)

以下一定要根据自己的文件名修改,不要照搬
将该文件重命名为: org.eclipse.cdt.ui_6.6.0.201909091956.jar.bak
将我们修改好的JAR包重命名为:org.eclipse.cdt.ui_6.6.0.201909091956.jar ,并复制到 CubeIDE安装路径\plugins 中 -
关闭自动补全激活延时
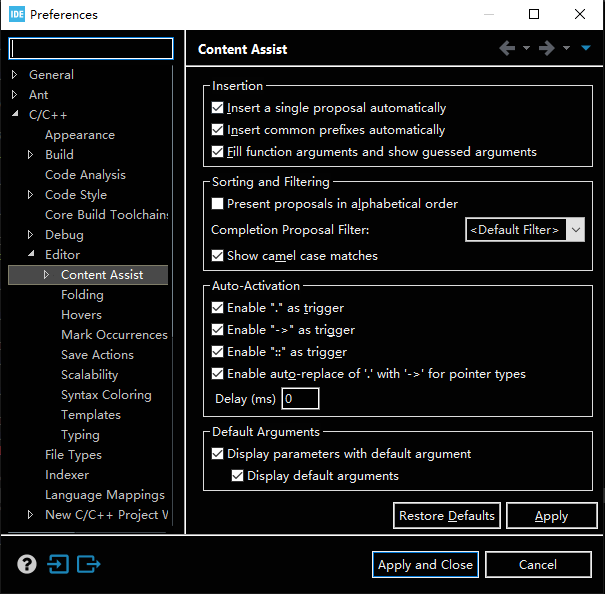
在Window->Preference中的C/C++ ->Editor->ContentAssist里将Delay(ms)改为0就大功告成了

-


![[Bonjour STM32] No.1-初识CubeMX](https://www.emoe.xyz/wp-content/uploads/2020/05/cubemx-600x390.jpg)
不知道为什么,但是使用了这个设置之后,白色的背景就没有了代码颜色标识,改用暗色模式有